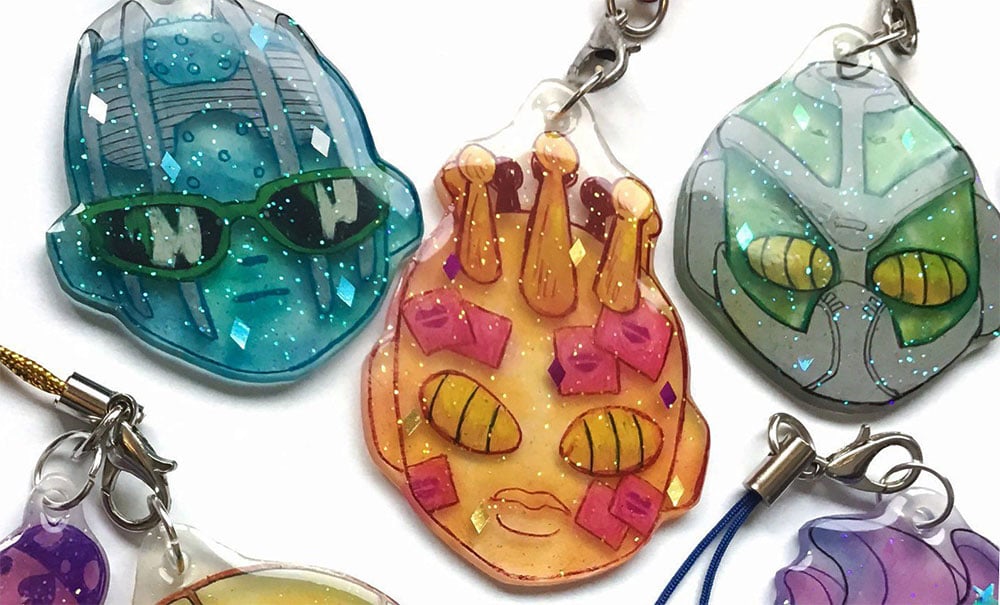
Unexpected jewellery pieces can be created from plastic materials such as juice bottles, drinking cups and take away boxes. There is no limit to how far your creativity can take you. Recycling junk into jewellery helps to reduce the pressure on landfill and your creations will make great conversation starters.
Gather materials
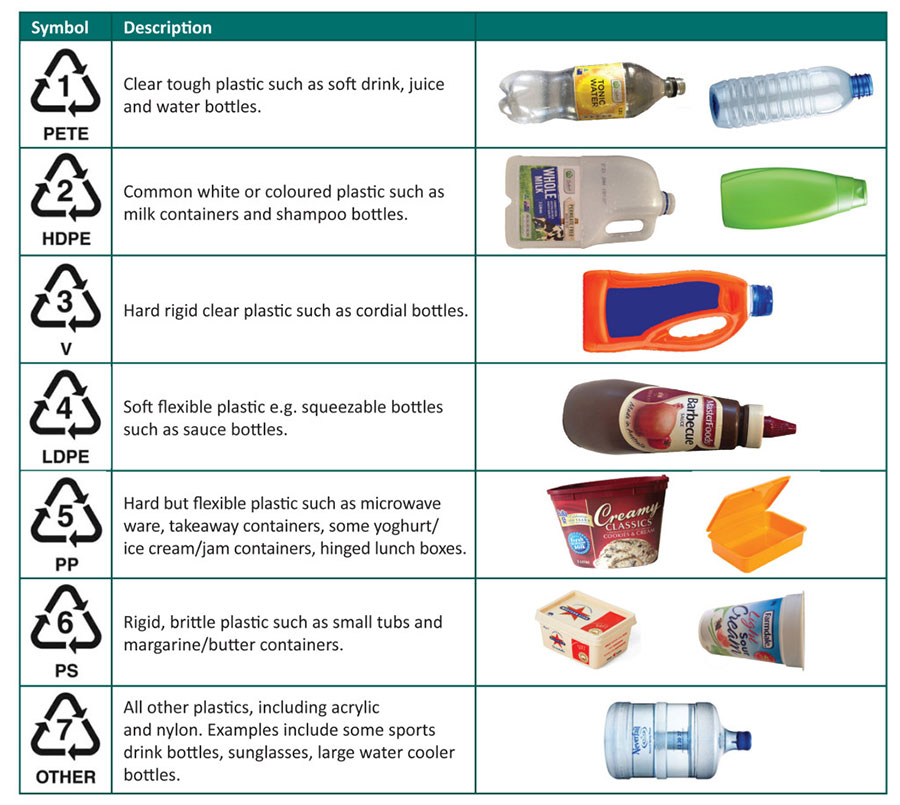
You will need #6 plastics – every plastic container has its own number which denotes suitability for recycling. #6 plastics are often not recyclable so turning them into jewellery will make a real impact on the environment. You will also need permanent markers in different colours. Depending on what you are making, you will also require clasps, wire, connectors, and pins – these are easily accessible from craft shops. Scissors, a hole puncher, polyurethane and a toaster oven are also needed for this project.

Make a shape
Cut up the plastic into a shape that you like. Keep in mind that the plastic will shrink, so always cut a bigger size than you require. How much each piece shrinks depends on the individual plastic’s properties, so experiment to find the best size for your needs. Using the hole puncher, make a hole at the top of your piece – this can be used to thread through jump rings or ribbons when you assemble your jewellery later.
Draw and design
Using the permanent markers, draw and colour a design onto your piece of plastic. Be as creative as you like. If your piece has the number #6 over it remember that it will disappear when you heat it up. Ensure to leave no spot uncoloured. Shrinking will cover a multitude of sins, so you don’t have to be exact while drawing and designing.
Cook up a charm
With your oven or toaster heated up to about 250 degrees, place your plastic on a piece of cooking paper and slide into the heat. The plastic will start to curl and then start shrinking. For safety purposes, try to do this in a well ventilated area and use a separate toaster oven for making your plastic charms as the fumes from this process can be dangerous.
Apply the finishing touch
Remove your piece from the oven, taking care not to touch it as it will be hot. Once cooled, dip your charms in polyurethane and let dry overnight. You can substitute this by painting your plastic charm with clear nail varnish. When your charms are dry, you can string them up as pendants on necklaces, as a bead on a chain or as earrings.

