Are you bored with trivial mass-market clothes? Do you meet every day at least one person in the same T-shirt you have? Do you want to wear hoodies with shots from your favorite films, thoughtful quotes, or maybe your own name? If the answer is “YES” then this article definitely deserves your attention.
If you want to create your own merch, you don’t need to search for companies specializing in printing. You can buy a simple, cheap heat press machine and do everything easily at home. It’s not as hard as it sounds. Just follow our guide step by step and, in the end, you’ll be a happy owner of an absolutely unique piece of clothing.
For the process, you’ll just need a few items:
- Heat press machine
- Heat transfer paper
- Printer
- Computer
- Garment
Step 1. Buy a heat press machine
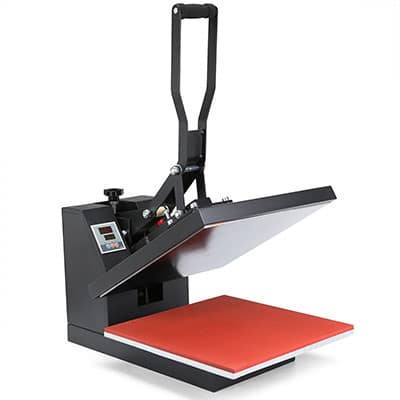
The first and most important step. It’s impossible to customize your clothes without a good heat press machine. So, take your time and search for a reliable one. Do not hurry with your choice.

There is a great variety of heat press machines. They come in different sizes and have different additional functions. You don’t need to spend lots of money and immediately buy the best one. At the, you’ll be satisfied with a simple one. There are many inexpensive machines on the internet. If you want to save even more, try to look for a second-hand heat press machine, but don’t forget to double-check its condition.
Of course, later, when you become a professional, you’ll need a better heat press machine. Or maybe you’ll even start your own business. But, until then, there is no need to purchase the most expensive one.
Step 2. Buy a heat transfer paper
For making heat press transfers, you can’t just use regular paper. You have to buy a special one that transfers printed images to garments when you apply heat to it.
You can buy such paper at your local craft store or on the internet. Usually, it comes in a pack, sometimes in a roll.

Before purchasing a heat transfer paper, you need to pay attention to it. There are several types of paper and not everyone will give you the best result. So, you need to select the right heat transfer paper. To do this, just ask yourself a simple question: What color is my garment?
- If it is white, yellow, light grey, blue, baby pink, etc., you’ll need transfer paper for light-colored materials. This kind of paper has a transparent backing. So, if you use it on a dark-colored fabric, the actual color of your T-shirt will appear on every empty space in your print and it just won’t look good.
- If it is black, green, red, blue, or another dark color, you’ll need transfer paper for dark-colored materials. This type of paper has a white backing that completely covers the actual color of your T-shirt.
Be sure you trim every leftover of the paper that doesn’t contain a print. Otherwise, you’ll have white spots on your dark garment.
Step 3. Choose the right printer
Before transferring your image on the garment, you’ll need to print it. There are two types of printers:
- laser printers
- inkjet printers
The inkjet printers are considered to work better when talking about printing on the transfer paper. They make the image look brighter. Also, they are cheaper than laser printers.
However, if you have at home only a laser printer, you don’t need to buy immediately another one. You have already invested in a heat press machine and a heat transfer paper. The laser printer will work fine, as well. You won’t see a huge difference.
You have to buy special transfer papers for laser printers, if you use this type of printer.
Step 4. Work with the image
- Choose the image
The most exciting and interesting step. Here you need to turn on your imagination and create a logo/image/quote that you’ll transfer later to your garment. If you don’t have an idea yet, look for inspiration online, but try not to steal someone’s ideas. Be creative!
Also, remember that bright, intense colors of an image will look better on fabric than plane pastel ones.
It’s very likely that your printer doesn’t print the color white. Most of them just leave empty space, while people usually use white paper and there is no need for a white print. So, make sure you won’t have blanks on your future garment.
- Edit the image
Not necessarily, but sometimes you need to slightly edit the image: change its size, color, the shape of any object, etc. For this step, use Photoshop or any other photo editor.
If you decided to decorate your clothes with a quote or numbers, don’t forget to mirror (flip) such images. Otherwise, it will transfer to your garment backward.
- Print the image
When you’re done with all the previous steps, it’s time to print the image on the transfer paper, using a printer.
However, it won’t be unnecessary to print the image on regular paper at first. Sometimes the image looks perfect on the computer screen, but when you print it, it displaces. This test print will help to save a sheet of transfer paper. And only if you’re completely satisfied with the result, go ahead and print the image on transfer paper.
- Trim the paper
Trim all the excess transfer paper that doesn’t have an image on it. This step will help to avoid white spots on your garment. This is primarily important to do with transfer paper for dark-colored fabric.
Step 5. Transfer the image to the fabric
First of all, you need to prepare and test your heat press machine. Following the instructions on its paper manual, try to turn it on, choose the right temperature, set the pressure, and turn on the timer.

If everything works, it is time to create!
- Place your T-shirt/hoodie/tote bag on the heat press machine.
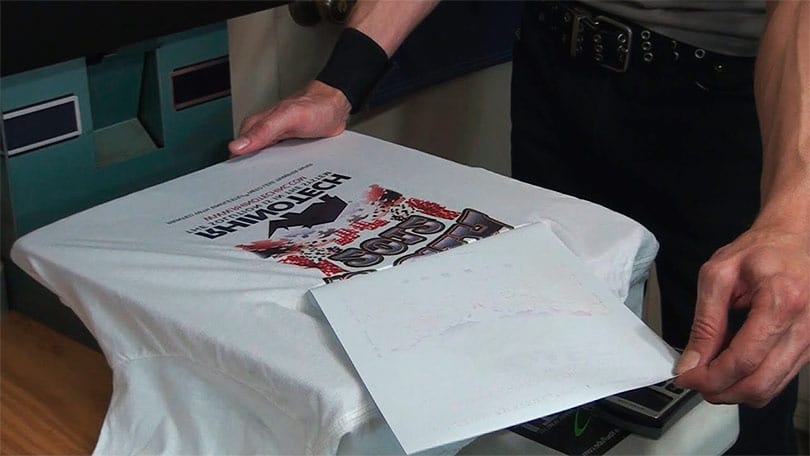
- Take the transfer paper with the printer image and put it on your garment, facing the image on it.
- Use a special silicon pad over the transfer. If you don’t have it, use a piece of any cotton fabric.
- Close the machine, using the handle.
- Turn on the machine, set all the settings, and wait until the timer stops.
- Open the machine, take the garment, and gently remove the paper from it.
Congratulations! Now you’re the happy owner of a unique piece of clothing.
Clothes have always helped people to express themselves. But sometimes it’s so hard to find a garment that you really like. But thanks to heat press transfers, you can become a real designer. Imagine the happiness on your friends’ faces, when you present them a T-shirt with their favorite band on it.
Just following this easy guide, you’ll be able to choose and buy your first heat press machine, transfer paper, and customize your wardrobe. No more boring T-shirts and trivial sweatshirts. It can sound difficult at first, but like in any other work you just need some practice.


