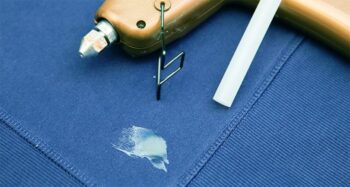
Cleaning a glue gun is not that hard. But if it still hot, that’s another conversation. It usually comes down in removing the dried glue and other foreign objects stuck in the muzzle of the gun. You can also use acetone to remove the glue and foil for the debris. To avoid the glue build up in the mouth of your glue gun, wiping it regularly after usage will lessen your burden.
You can also try the following steps on how to clean your hot glue gun with aluminum foil properly:
- Aluminum foil – aluminum foil is known for its ability to scrub unwanted debris in any type of surface except for glass. Foils is the right choice in removing the rubbery remains of the glue stick. Get a piece of aluminum foil enough to cover your fingers. It will keep your fingers from getting burned while scrubbing the debris.
- Scrub the point with the foil ball – when cleaning the glue, the hot glue gun, press the tip into the foil ball, make sure not to touch the point to avoid burn injuries. Rotate the foil ball to scrub the debris. Once you finished cleaning the tip, rub the body of the gun with the foil. By the time, the tool should be cooling off so you can remove the remaining glue easily. One way to clean the tip of the gun is through a dryer sheet. After that, rub the sheet across the edge then, carefully remove the glue.
- Heat it with a blow dryer or a heat gun – turn the glue gun sideways on a silicone mat if possible. Put the foil on the top of the glue. Heat the gun until the debris melt then starts rubbing it with the foil ball. The melted glue should be easier to remove at that time. Removing the gun stand will help to clean the whole gun.
- Use a pin or any pointy tool to polish the base – If you have a wireless glue gun, you can see a hole at the bottom, and it has to be cleaned regularly. Failing to do this will lead to difficulty in setting the base. Scrape out the hole with a needle or a pin leaving the bottom with a perfect fit.
- Pour Acetone – Apply acetone on a towel, then start rubbing it to the glue gun to wipe off the glue stains and dirt. The acetone will keep the glue gun clean and polished.
- Disinfect the Glue gun – Expect that your glue gun is covered with harmful germs, especially the handle. Applying disinfectant will keep the tool from infections and other dangerous diseases. Make sure to unplug the glue gun and use non-flammable disinfectant to avoid accidents. Using vinegar as an alternative is also a great idea to wipe off the bacteria. Mixing it with water and any liquid disinfectant will amplify its effect.
Soak the towel in the mixture then wipe the gun down to the base. Repeat the steps until the glue gun becomes shiny.
Using crayons in glue gun for painting is quite popular now. However, there are instances wherein crayons damage the tool and clogging the hole. Taking care of your things will not only maintain its efficiency but also prolongs its productivity. Clogged glue guns can be fixed by heating the metal tube in the tool. Crayons are made out of wax and mixed with different color figment for aesthetic purposes. Melting is an excellent way to wash it out. After that, cool it off then wipe the crayon stains with a wet towel.
Repairing the Inner Parts

Cleaning your glue gun does not mean that it’s always about the visible areas. It also tackles the inside spaces to make sure if it has damaged parts.
Nozzle Leaks
Check if the gun has nozzle leakage or if it has clogged drainage. A fixed glue gun will be releasing the glue after a few minutes after plugging it. If your tool gets many leakages, it might be the glue stick has the problem or the gun itself. Read the users manual and check how to open the nozzle or consult with an expert. Ask them about the glue sticks which is compatible with the glue gun.
Wearing out of the nozzle can also be the cause of excessive leakage, but don’t worry, these can be easily repaired.
Weak flow
If the glue stops from coming out or the flow of the adhesive comes out very slow, this could be the fault of the glue stick. Some glue sticks are hard and require a higher temperature to melt. It could also be caused by a broken grip that is failing to squeeze the adhesives out of the gun.
Back Melt
If your glue gun is experiencing a back melt, your nozzle is probably clogged. Back melt is produced by the adhesive build up in the spout preventing the paste from coming out and damage the interior of the gun. You can fix it by keeping the device plugged in and wait until the glue leaks.
Reminder: pressing the trigger with too much pressure will alleviate the problem. Press the trigger higher than 80psi will make it worst.
Stucked Glue Sticks
Make sure that the size of the glue stick is correctly fit in your glue gun. The glue might jam or burnt, and can cause damage to the tip. You may need re-adjust the control valve to regulate the adhesive flow.
Heat Gauge Problems
Overheat can be associated with the temperature gauge problems. If you are suffering from inconsistent flow like, for example, tacky surge or thin tide, you may need to check the heat regulator. It might happen due to short circuit or burnt wirings.
Broken Case
The cracked or chipped case is due to inevitably usage in a long period of hours. Anything that exposed to high temperature is at risk of brittleness and fragility. It goes the same way in the gun’s casing. Damage on the case could also be due to mishandling or applying of too much pressure on the surface. Cracked cases can expose the interior parts and can cause mechanical failure.
Electrical Failure
Some of the glue guns already have a built-in power source or rechargeable battery. If the tool stops from functioning even after charging it, maybe there are problems with the power supply. Changing the batteries will probably fix the drawbacks.
One of the most common issue in handling glue gun is the nozzle; you can repair it in three easy steps, follow the instruction below:
- Step#1. Preheat the glue gun – failing to do this will result in permanent leakage. Once the equipment cools off, strip the old nozzle by a wrench or pliers to release it from the body. Don’t forget to use safety gloves to keep your hands from burning.
- Step#2. Check the nozzle if the screws are inserted correctly in the screw holes. Check if there are gaps between the casing and nozzle to keep foreign materials from entering the tool.
- Step#3. Once you finished checking it, start screwing the new spout. Remember to don’t over tighten nor too snug to ensure that the nozzle will not be taken off quickly.
Disassembly Tips

If you want to repair your glue gun without the help of electricians, you can use these guidelines to disassemble the spare parts correctly. It will also require a set of tools and special care. You can reduce the load of fixing and using your glue gun with the following tips:
- Remove it from the power supply.
- Determine the spare parts that hold it together. Some brands of glue guns come with special screws to keep the whole equipment together. Some require a unique tool, as a typical flat tip, and other average screwdrivers will not work.
- Apply alcohol to strip off plastic seals. You can also use it to remove the adhesives to prevent the case from breaking when you remove the screws.
- Make sure to remove the trigger.
- Add power to the heating parts to melt the glue. Afterward, you can remove the remaining parts.
- check the temperature gauge for loose connections and wounded wires.
- If you purchased a pneumatic type of glue gun, make sure to remove the hose and if necessary, purge and drain it base on the manual guide.
- Keep the device unplugged before disassembly.
- Keep the cavity clean and free from debris.
- Inspect all the tubes for any strains, hard knots or thinning of the hose. Carefully check if there are glue burns. Adhesive char builds up due to thermal degradation. The glue overheats and starts to block the pathway and the tools mechanism.
Maintaining you’re tools are always associated with the proper usage and precise mechanisms to keep it fully operational. Asking advice from the experts will lead to an ideal outcome. Also, make sure to read the manufacturers recommendations for an appropriate way on how to use the device.


