So, if you’re trying to fix up your ride or put together some dope furniture, you have to know how to glue metal to wood, my friend. It’s an essential skill that can help you achieve that sturdy bond you want. But don’t worry; it’s not rocket science – I got you covered. In this article, I’ll break down the steps to glue metal to the wood so that you can start your project like a pro. Let’s get into it!
Types of Glue for Metal to Wood Bonding
Alright, do you want to glue some metal to wood? Let’s talk about the different types of glue that’ll get the job done.
Epoxy
First up, we got epoxy. This stuff is like the OG of metal-wood bonding. It’s strong and can withstand high pressure, heat, and water. Plus, it sets in a few hours, so you can start your project immediately.
Polyurethane glue
Next, we got polyurethane glue. This one is great for dealing with a porous surface, like unfinished wood. It expands as it dries, filling any gaps for a solid bond. Be careful not to use too much, which might create a foamy mess.
Cyanoacrylate glue
If you’re looking for a fast-acting solution, cyanoacrylate glue, aka super glue, might be your best bet. It dries in seconds and can hold up to a decent amount of weight. But remember, it’s not as durable as other options, so it might not be the best choice for heavy-duty projects.
Contact cement
Lastly, we got contact cement. This glue is excellent for bonding large surfaces, like countertops or table tops. It sets quickly and creates a strong, permanent bond. But be warned, it’s super stinky, so ensure you work in a well-ventilated area.
So, there you have it – the four main types of glue for metal-wood bonding. Choose wisely.

Preparation
Before you start slapping that glue on, let’s talk prep work. You can’t just glue metal to wood and expect it to magically stick – you gotta get those surfaces prepped, bro.
Cleaning the surfaces
First things first, you gotta clean the surfaces. Ensure they’re free of dirt, grease, or other gunk that might interfere with the bond. You can use a degreaser or some rubbing alcohol to get the job done.
Sanding the surfaces
Next, you gotta sand those bad boys. Use fine-grit sandpaper and go in the same direction as the grain. This helps rough the surface, giving the glue something to grab onto.
Applying a primer or surface conditioner
If you want to take things to the next level, apply a primer or surface conditioner. This helps the glue adhere better and can prevent the wood from absorbing too much of the glue. Just ensure you read the instructions carefully because not all primers are created equal.
Now that your surfaces are prepped, you’re ready to start gluing. Just remember, good prep work can make all the difference in the strength and durability of your bond. So don’t skip this step, homie.
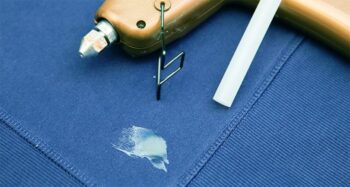
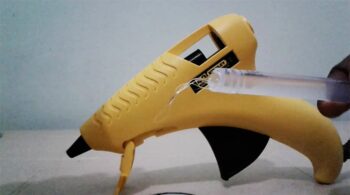
Applying the Glue

Alright, it’s glue time, my dude. Here’s how to apply each of the different types of glue for metal-wood bonding:
- Epoxy glue: Mix equal parts of the resin and hardener together. Make sure you use a clean mixing surface and stir thoroughly. Then, apply the glue to one of the surfaces using a brush or a stick. Be sure to spread it evenly and avoid leaving any clumps. Next, press the two surfaces together and hold them in place for the recommended time, usually a few hours. And boom, you’re done.
- Polyurethane glue: Apply a thin layer of glue to both surfaces using a brush or a stick. Make sure you work quickly cuz this stuff dries fast. Then, press the two surfaces together and clamp them in place for the recommended time, usually around an hour or two. Be careful not to use too much glue, or you might end up with a foamy mess.
- Cyanoacrylate glue: This one is easy peasy. Just apply a small amount of glue to one of the surfaces and press the two surfaces together. The glue will dry in seconds, so make sure you get it right the first time. And that’s it.
- Contact cement: Apply a thin layer of glue to both surfaces using a brush or a roller. Then, let the glue dry for the recommended amount of time, usually around 15 minutes. Once the glue is tacky to the touch, press the two surfaces together and hold them in place for a few minutes. And just like that, you’re done.
There you have it, my dude. Four different types of glue and four different application methods. Choose the one that’s right for you and get to work.
Clamping and Drying
Now, I know you’re probably excited to see your metal and wood together, but don’t get ahead of yourself, my friend. You gotta let that glue dry and cure properly, and that means clamping those bad boys together.
Clamping is super important because it holds the two surfaces tightly together, allowing the glue to set properly. Without clamping, you risk the two surfaces falling apart or shifting, weakening the bond.
When it comes to clamping, make sure you use the right tools for the job. You can use a variety of clamps, from bar clamps to C-clamps, depending on the size and shape of your project. Just make sure the clamps are tight enough to hold the surfaces together but not so tight that they deform the materials.
And don’t forget about the glue squeeze-out. The excess glue oozes out from the sides when you clamp the materials together. You wanna wipe that stuff off with a damp cloth before it dries, or you’ll be left with an unsightly mess.
As for drying time, that can vary depending on the type of glue you’re using and the temperature and humidity of your workspace. Make sure you read the instructions carefully and follow the recommended drying times. And be patient, my dude. Rushing the drying process can lead to a weaker bond, so let that glue cure properly before you start showing off your project to all your homies.
So, there you have it – the importance of clamping and tips for getting it done right. Just remember, taking the time to clamp and let the glue dry properly can make all the difference in the strength and durability of your bond.
Finishing
Alright, you’ve clamped your metal and wood together and let the glue dry – congrats, my dude! But we’re not quite done yet. To really make that bond shine, you gotta finish it off with some sanding and painting or staining.
- First up, sanding. After the glue has fully cured, you wanna sand the joint to smooth out any rough spots or excess glue. This will make your project look more polished and professional. Just be careful not to sand too much, or you might weaken the bond.
- You can choose from a variety of paints and stains, depending on your style and needs. And if you’re looking to add some color or protection to your project, painting or staining is the way to go. Not only does it make your project look good, but it also helps protect the wood and metal from moisture and wear and tear.
- Just make sure you prep the surfaces properly before painting or staining. That means cleaning them thoroughly and using a primer or sealer if necessary. And don’t forget to use the right tools for the job, like brushes, rollers, or sprayers.
And there you have it, my dude – sanding and painting or staining to finish off your metal-wood bond. With the right techniques and tools, you can take your project to the next level and show off your skills to all your friends.
Safety Considerations
Now, before you go diving into your metal-wood bonding project, we gotta talk safety, my dude. Working with glue and materials can be messy and even dangerous if you don’t take the proper precautions. So, here are some safety considerations to keep in mind:
Protective equipment
First and foremost, wear the right protective equipment. That means gloves to protect your hands from the glue, eye protection in case of splatters, and a respirator or mask to avoid breathing in harmful fumes.
Speaking of fumes, proper ventilation is key when working with glue. You wanna make sure you’re in a well-ventilated area, or even better, set up a fan or ventilation system to keep the air moving. Some glues can give off harmful vapors, so you don’t wanna be breathing that stuff in.
And if you’re using power tools for sanding or cutting, make sure you’re using them safely and wearing the proper protective gear. That means eye and ear protection and keeping loose clothing and jewelry away from the machinery.
Proper ventilation
And last but not least, keep your workspace clean and organized. Glue and materials can be slippery and messy, and you don’t wanna be tripping over things or knocking over containers. Plus, a clean workspace just makes the whole process more pleasant and enjoyable.
So, there you have it, my dude – some safety considerations to keep in mind when working with glue and materials. By taking the proper precautions, you can avoid accidents and enjoy your project with peace of mind.
Conclusion
Alright, my dude, we’ve covered a lot of ground on how to glue metal to wood. Let’s do a quick recap of the key points to make sure it’s all fresh in your mind:
- We talked about the different types of glue that work best for bonding metal and wood, including epoxy, polyurethane glue, cyanoacrylate glue, and contact cement.
- We also covered the importance of preparing the metal and wood surfaces before gluing, including cleaning, sanding, and using a primer or surface conditioner.
- When it comes to applying the glue, we gave step-by-step instructions for mixing and applying epoxy glue, using polyurethane glue, applying cyanoacrylate glue, and using contact cement.
- We also talked about the importance of clamping the metal and wood together while the glue dried and gave some tips for choosing and using clamps effectively.
Finally, we discussed finishing the bond with sanding and painting or staining and touched on some safety considerations for working with glue and materials.
So, my dude, with these key points in mind, you’re ready to tackle your next metal-wood bonding project like a pro. Just remember to take your time, follow the instructions, and stay safe and organized, and you’ll be sure to impress your friends and family with your handy skills. Happy gluing!